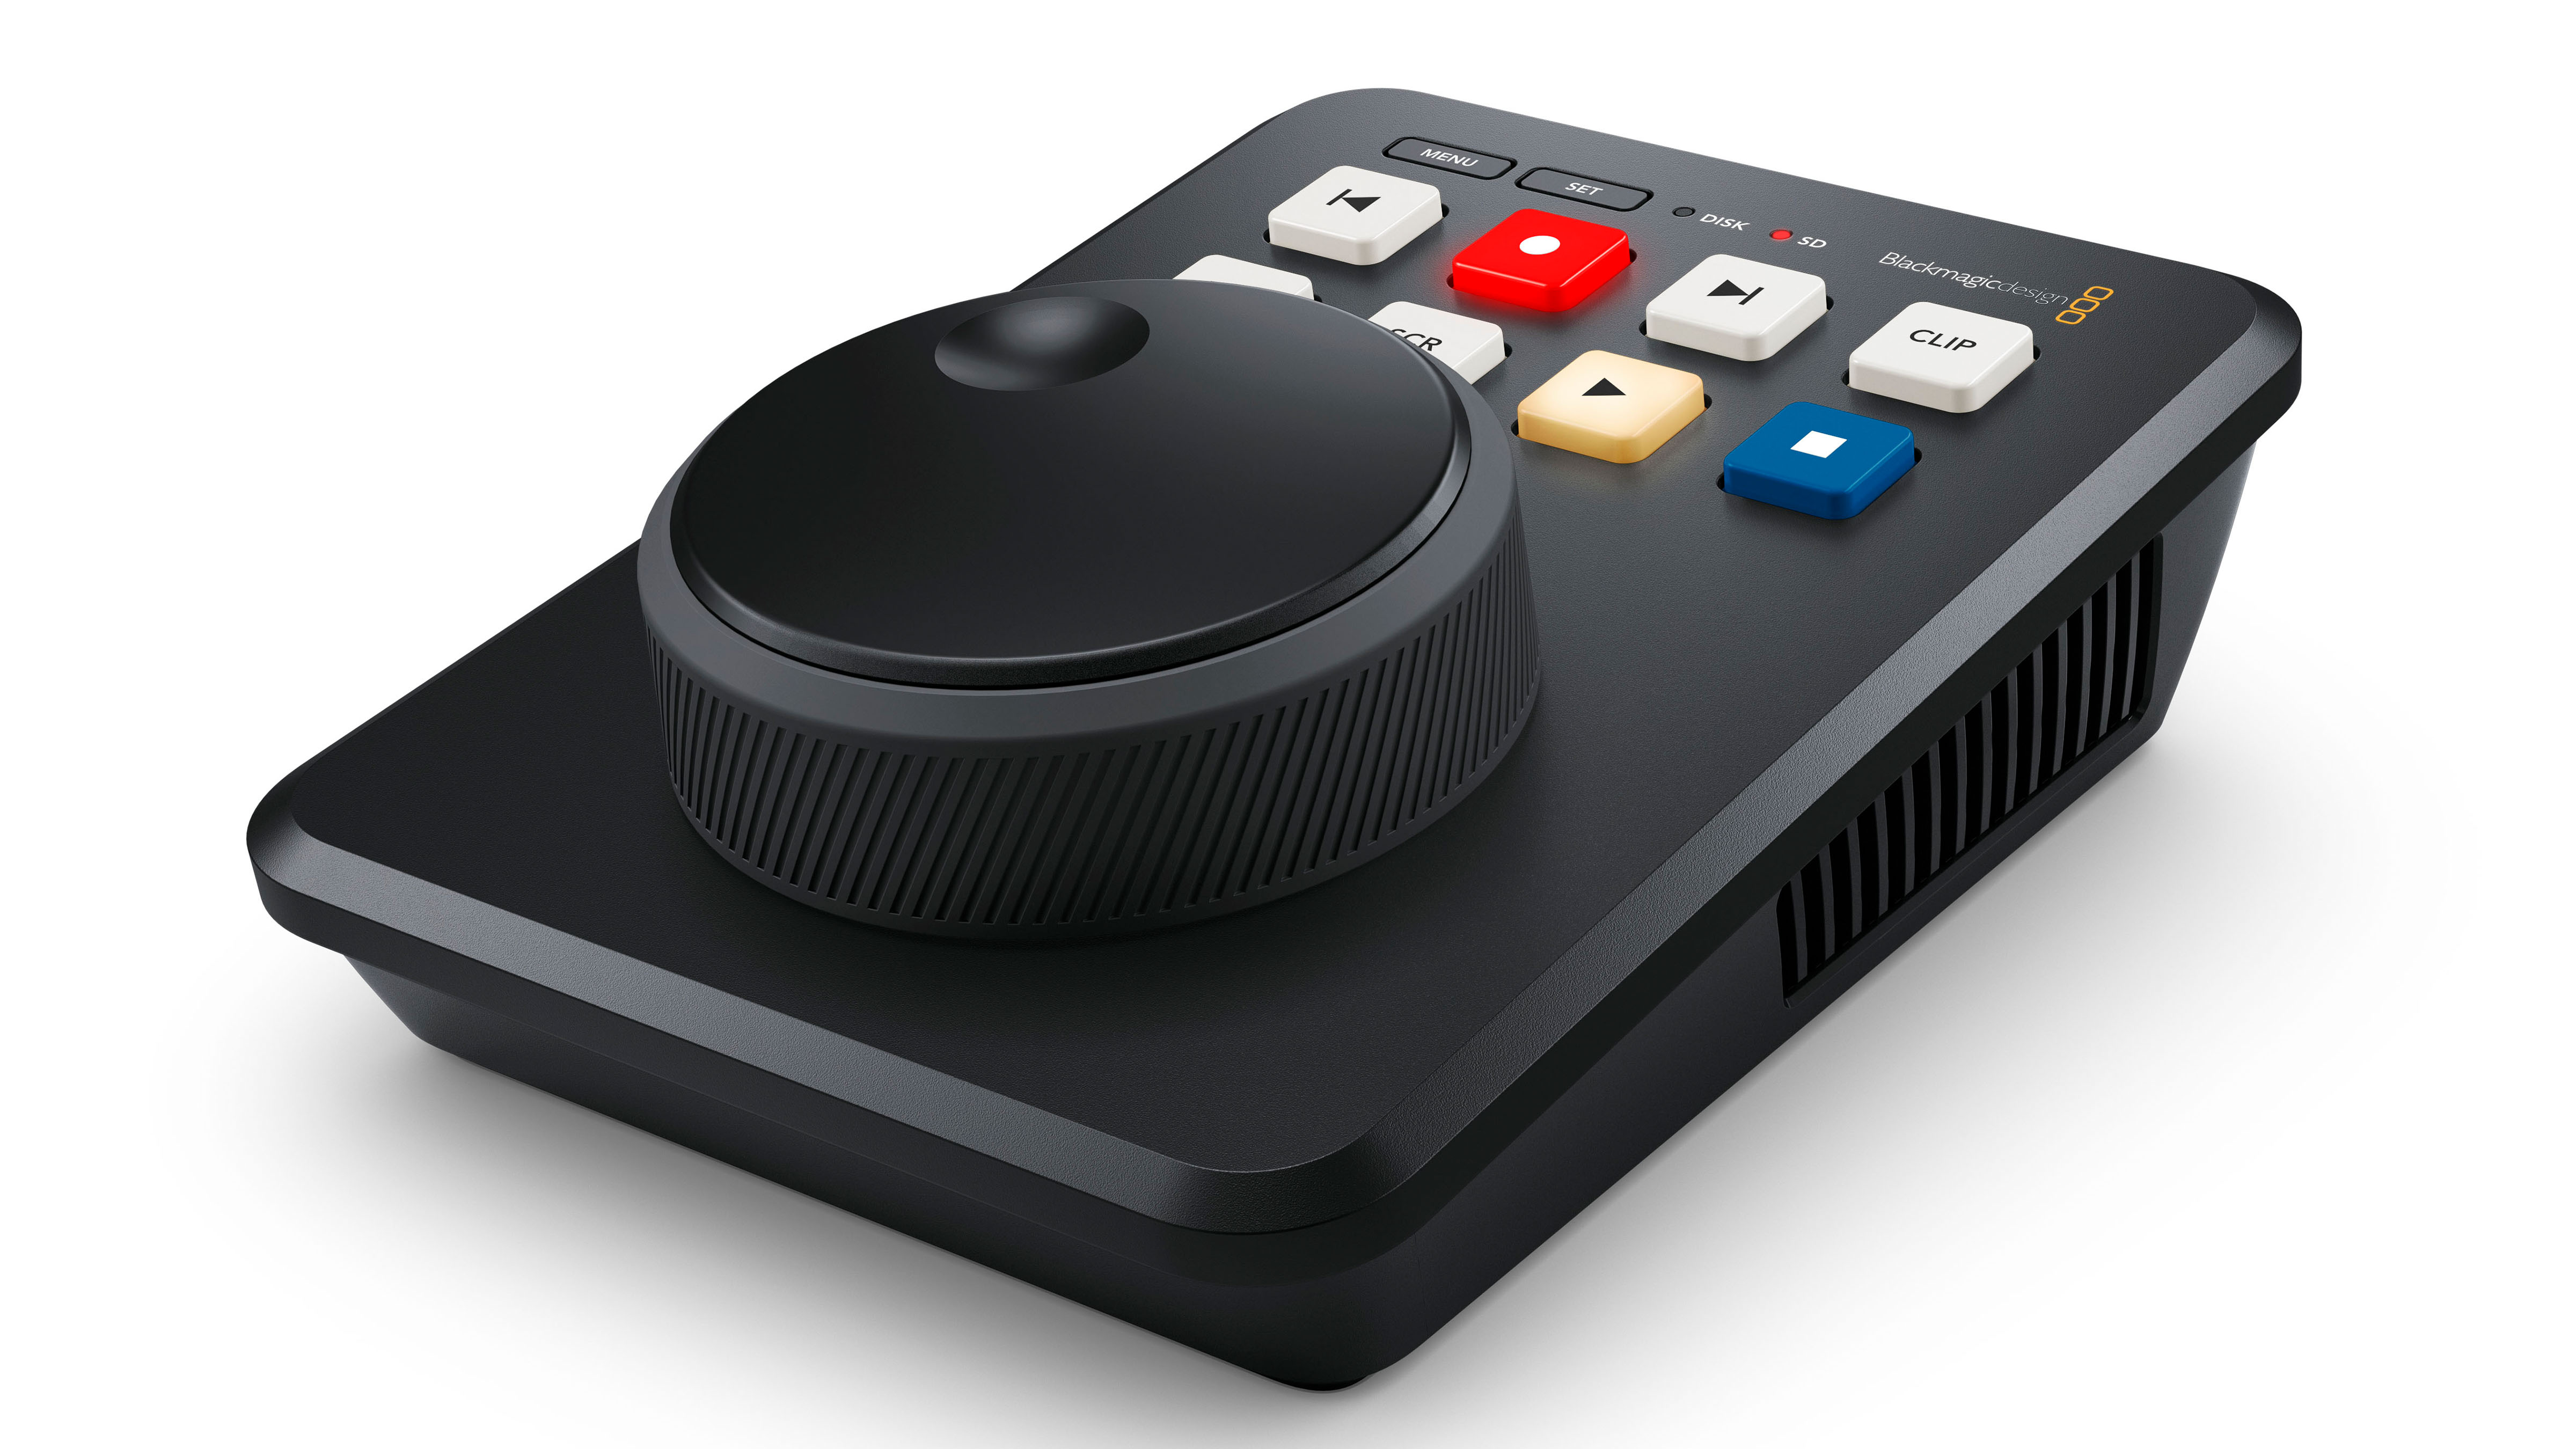
Almost all video technology has shrunk in size, become more streamlined, and offers greater capabilities. The HyperDeck Shuttle HD from Blackmagic Design is no different. Weighing less than a pound and measuring less than 5.5 inches front to back, this recorder/player provides quick access to stored or recorded footage. If your inputs and outputs are HDMI, this is a great deck for you.
[Review: Konftel Combo Delivers 4K Videoconferencing]
When connected to a computer or an input on one of the Blackmagic Design ATEM Mini line of live production switchers, you can select stored videos to be played on demand as well as record the camera or switcher’s output to an SD card or USB-C drive. Any type of DNx, ProRes, or H.264 video file you have stored on your media may be retrieved and sent to a switcher, displayed on an HDMI monitor with HDMI, or streamed over a network using the Ethernet connection.

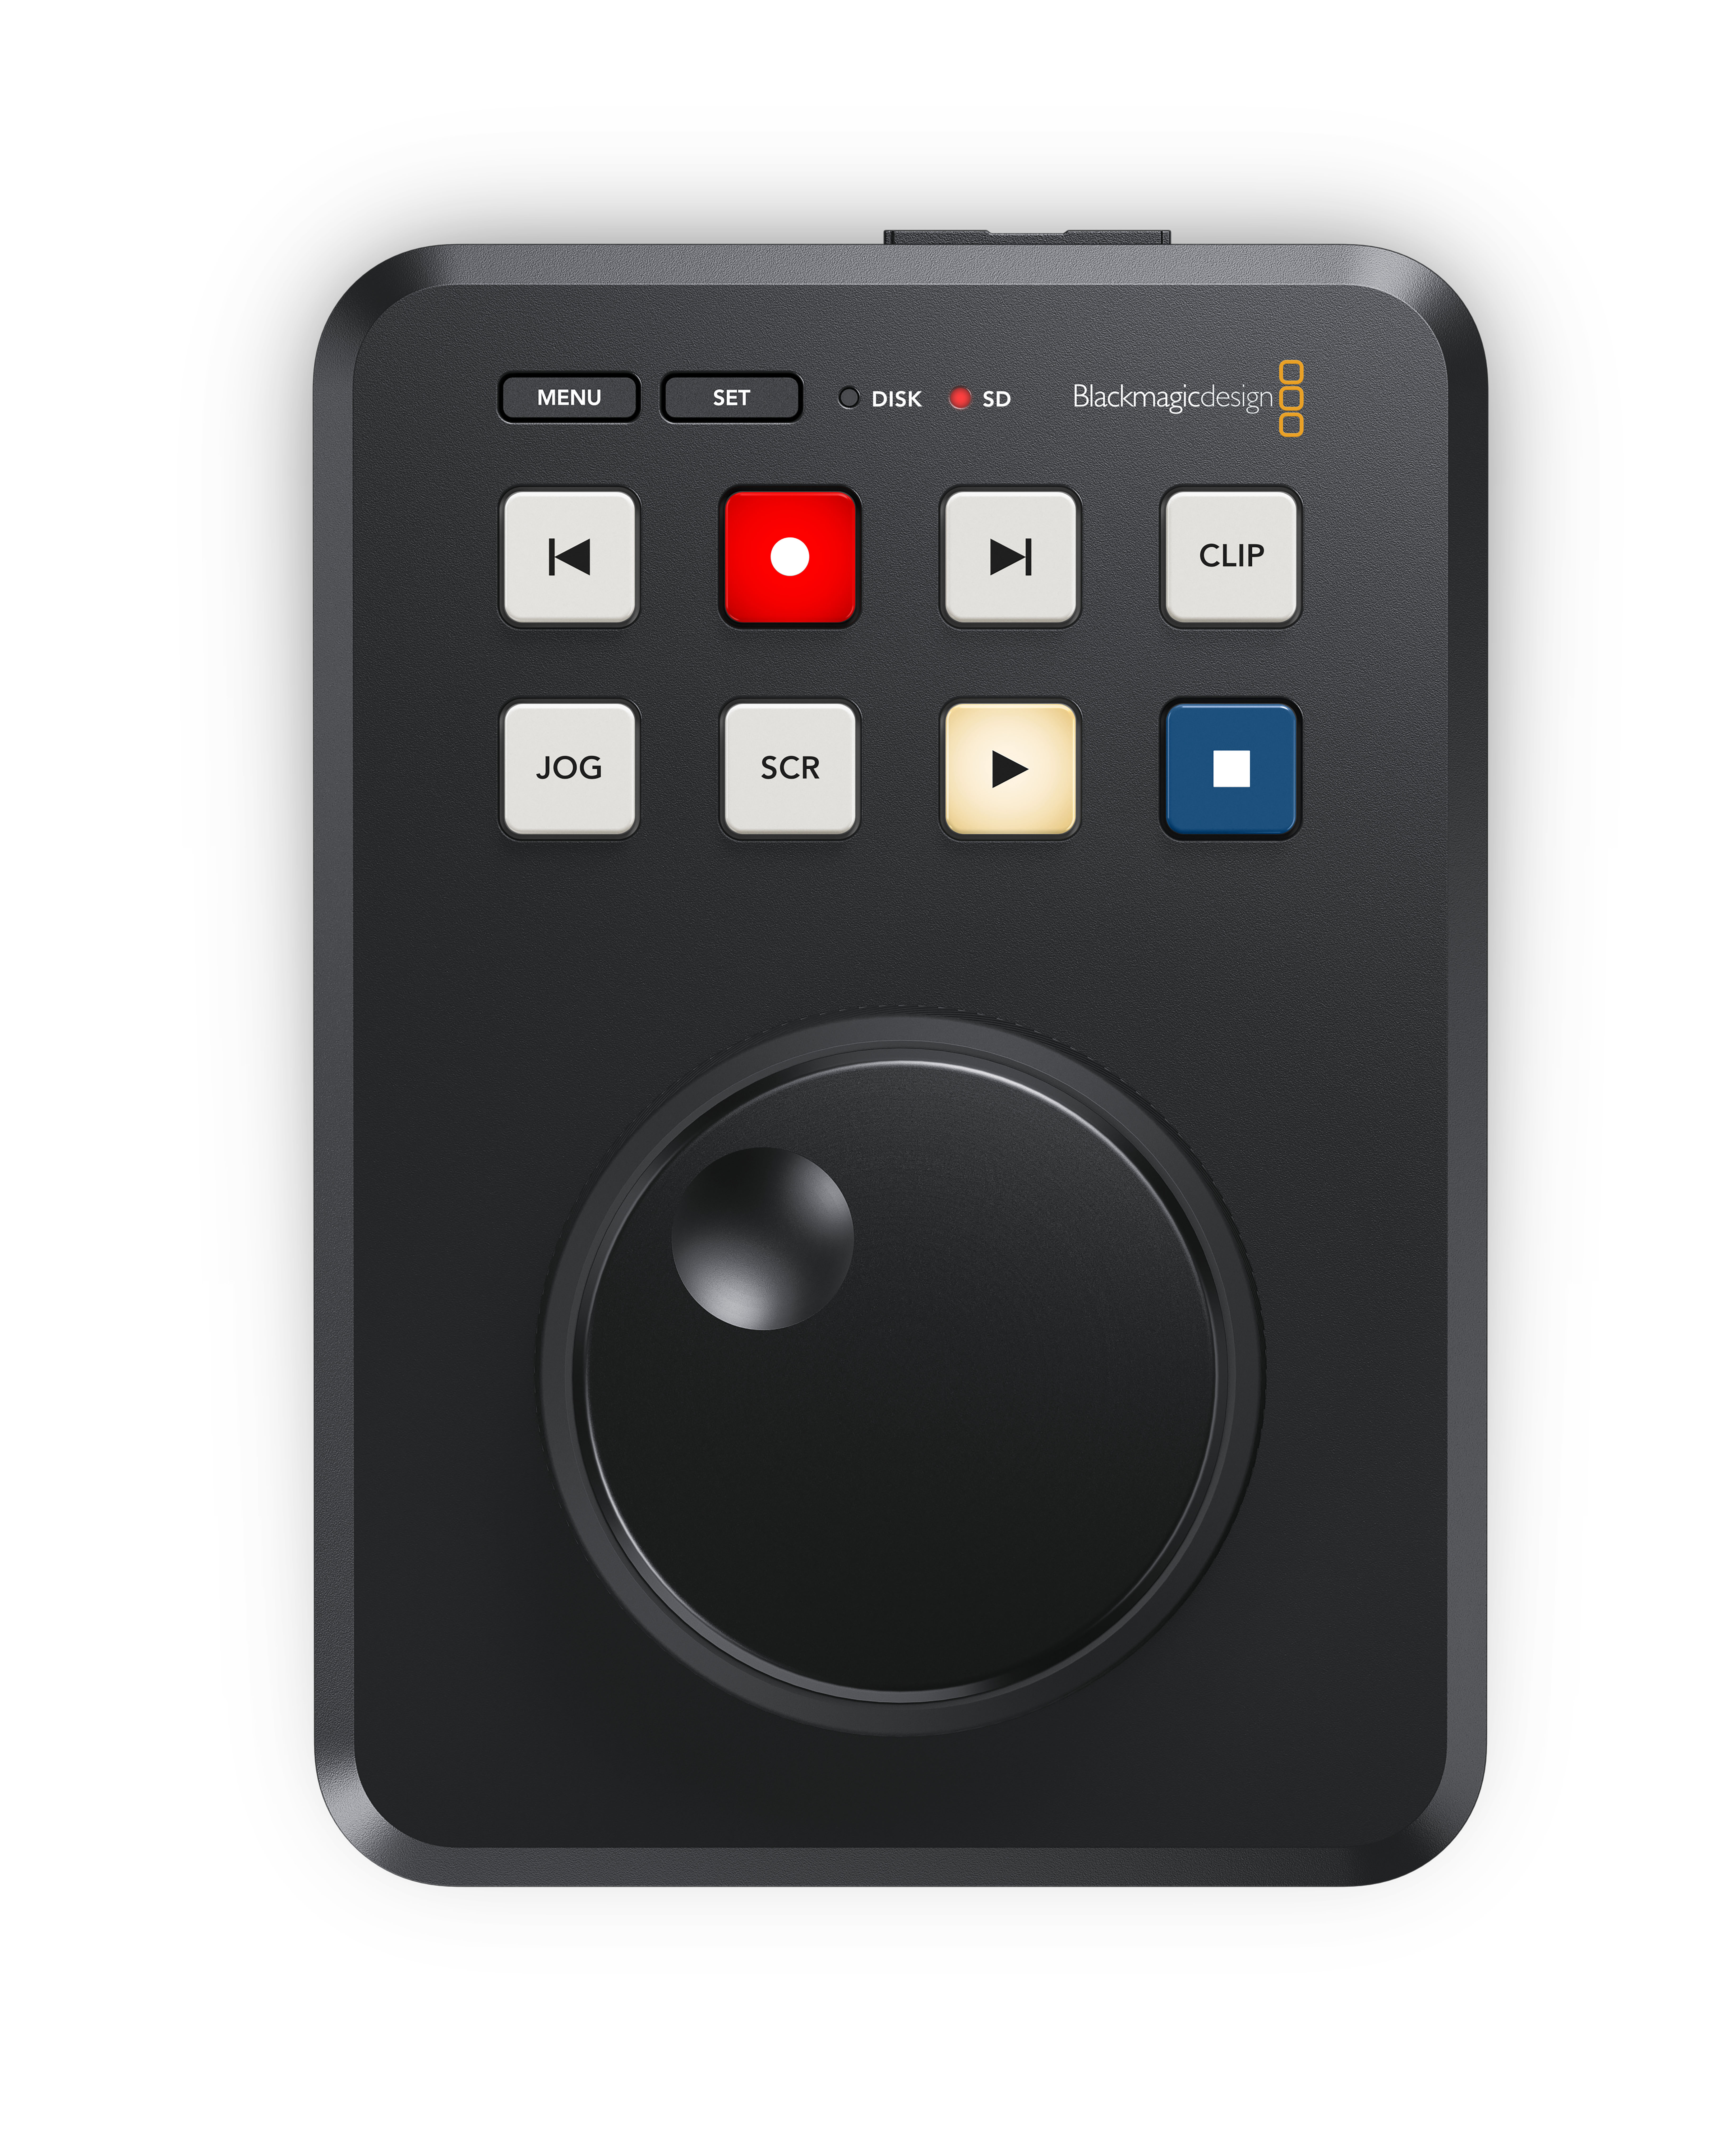
One end of the HyperDeck Shuttle HD is dominated by a large shuttle dial, which can be used to browse through stored 1920x1080 HD files. On the top left are the recessed Menu and Set buttons. Selecting Menu brings up the Record heading with input, codec, and trigger record. The input has HDMI as your only choice, while codec offers various versions of H.264, ProRes, and DNxHD. Pressing the Set button locks in your choice.
If you want to use the HyperDeck Shuttle HD as a prompter, you can access it in the second menu topic, Monitor. Here you can select the percentage size of the font, line spacing, side margin, and whether to flip the image vertically or horizontally. This feature alone is worth the price, because any RFT file can be viewed on the prompter, so you don't need to purchase additional software.
[NAB 2022: Blackmagic Design Announces New ATEM Constellation HD Switcher]
The Audio Menu allows two options in recorded audio channels, PCM or AAC. Storage, the final menu, gives you the option of Media 1 and 2 (the SD card or USB-C Drive), USB spill, and format media.
On the unit itself, an LED will illuminate next to “Disk” on the unit if the USB-C input is connected—or before “SD” if an SD card is inserted. Use the back skip or forward skip buttons to move quickly between clips; the clip button limits you to playback of a single clip. There are also record, play, and stop buttons, as well as jog and scroll buttons for reviewing clips with the dial.

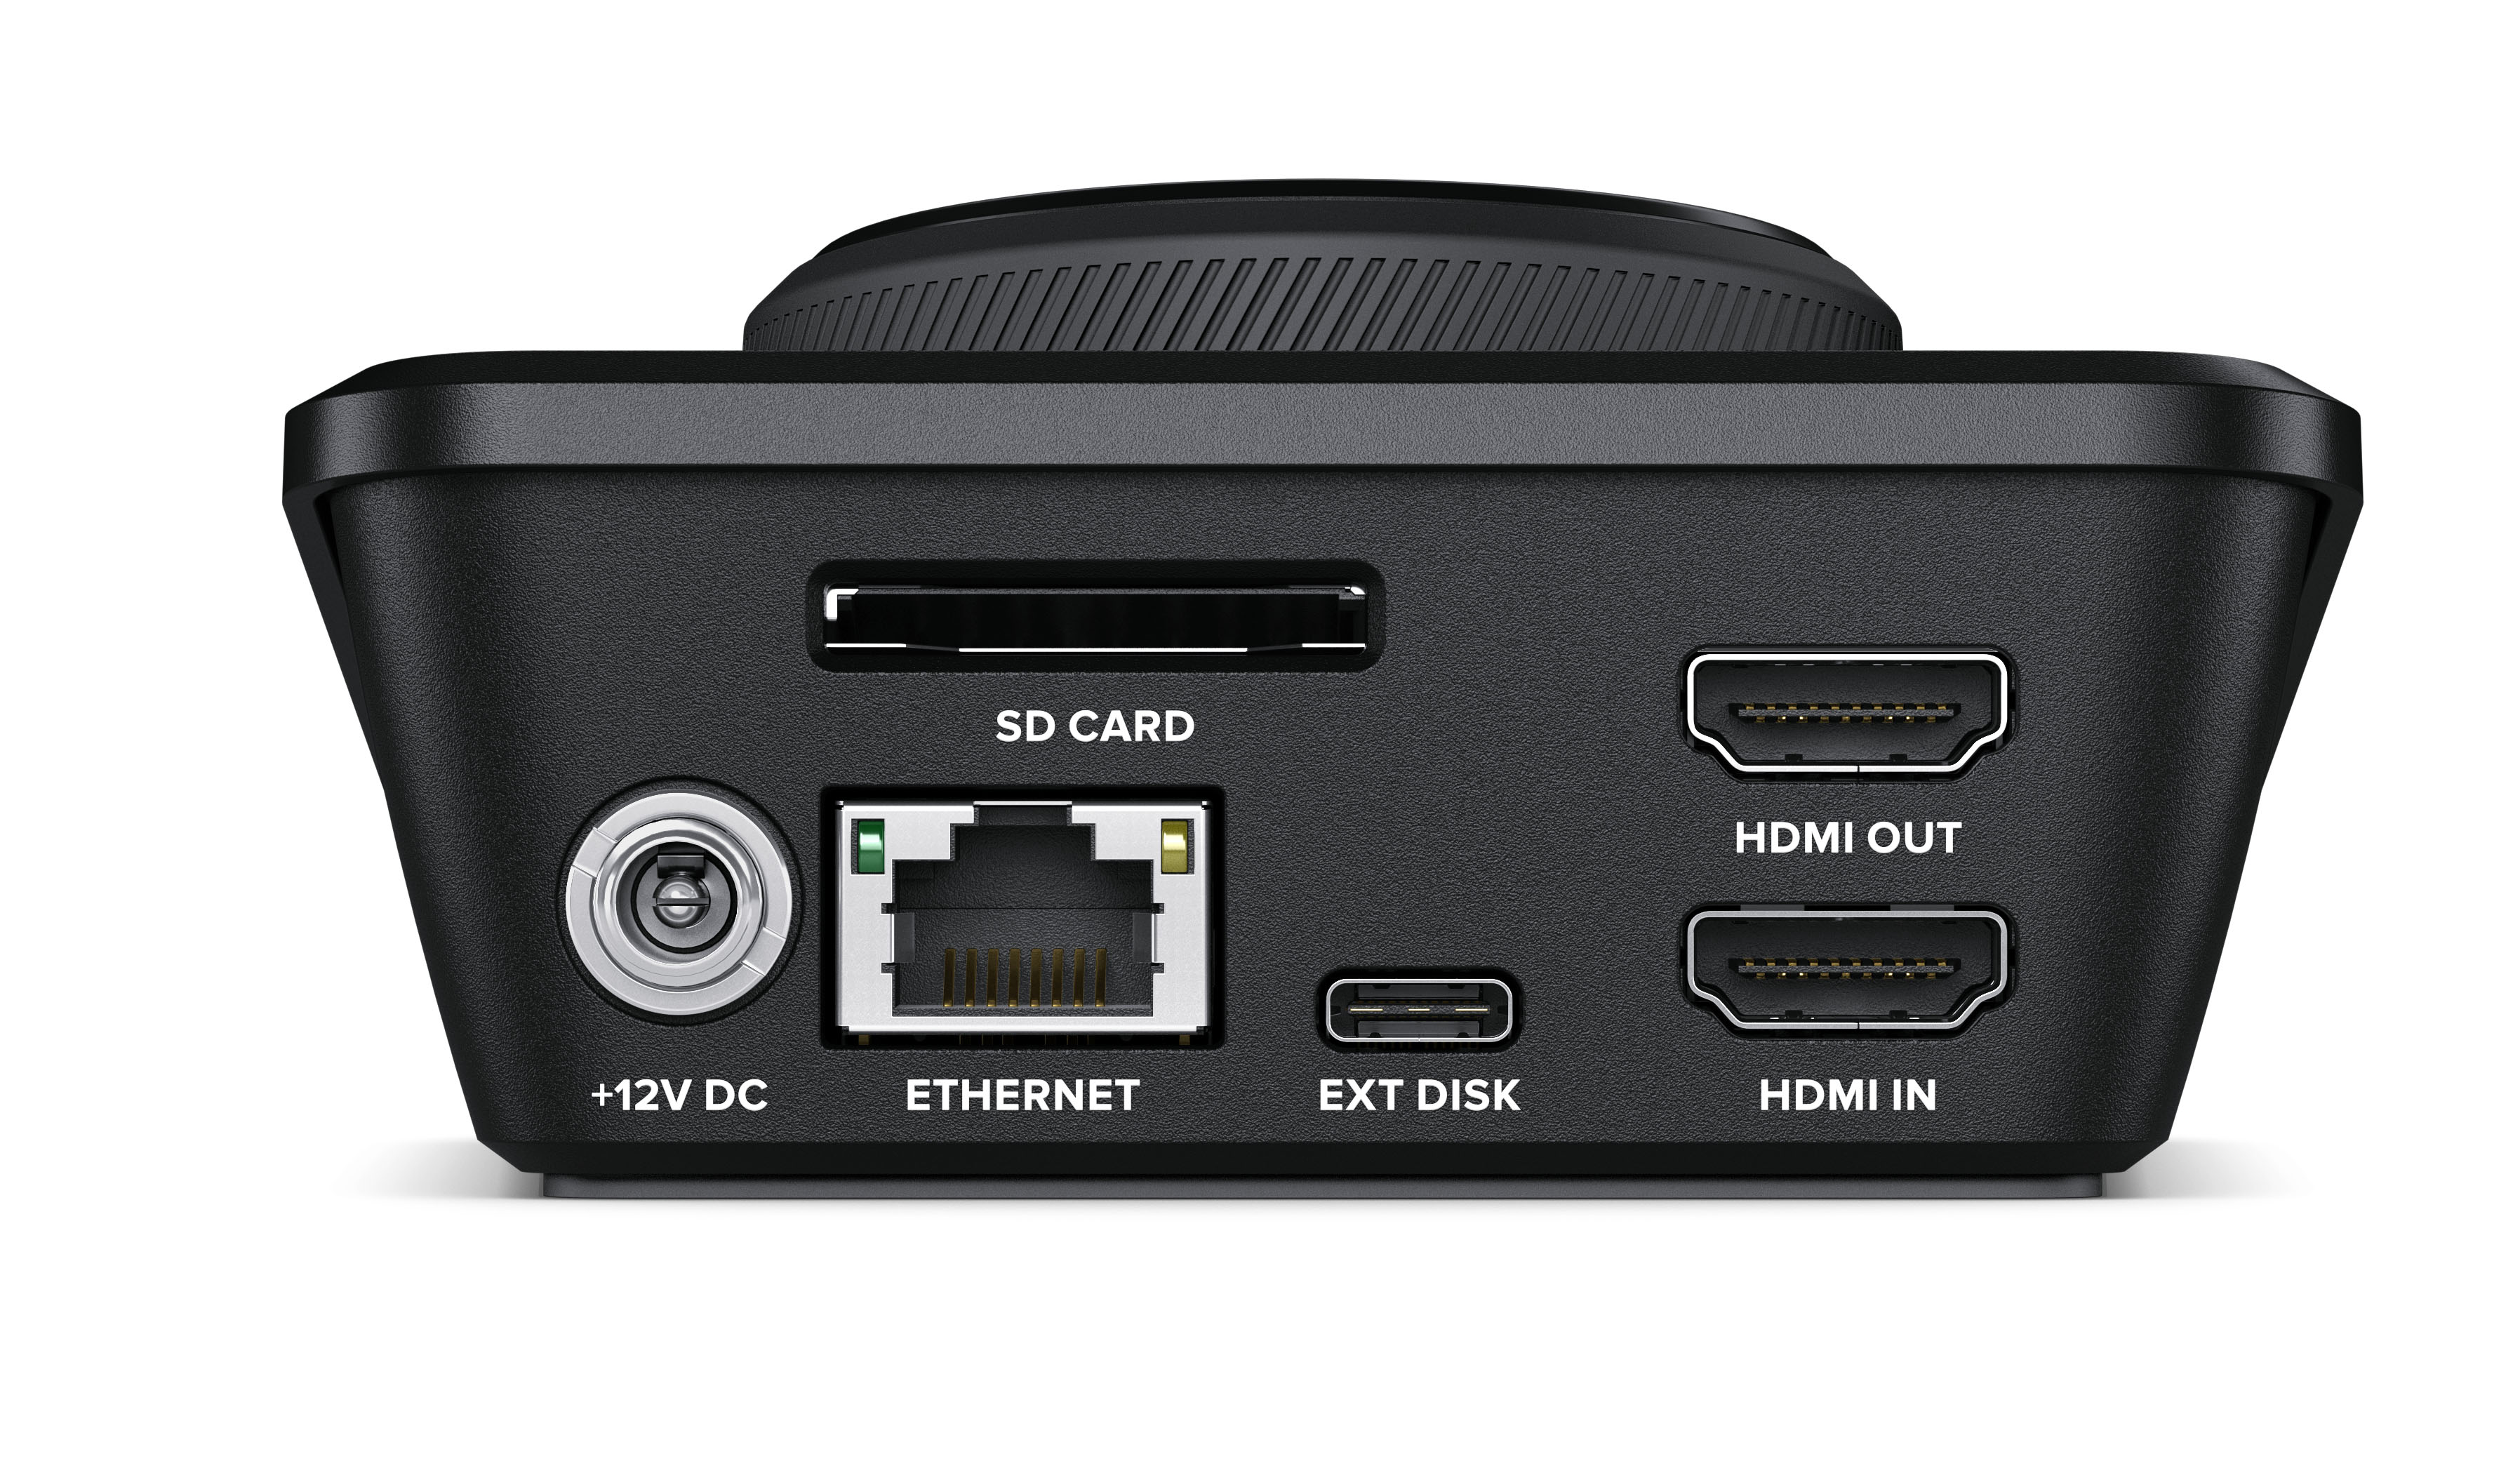
The left and right sides have vents, while the rear is equipped with a 12v DC port, Ethernet, USB-C for external disk, HDMI I/O, and an SD card slot. The system is ready to use out of the box. (I checked online for the latest software version, but mine was already up to date.) In fact, the only items in the box are the unit itself, various plugs to make your AC adapter compatible to the wall socket, and the external power supply.
The Fine Print
The HyperDeck Shuttle HD arrived in time to be used by my students during our university's Summer Video Institute. In the six-day course, each of the 14 students had to write, shoot, direct, and edit three videos to be shown to an invited audience on Saturday.
The HyperDeck Shuttle HD couldn’t be easier to use. There is simply no learning curve.
Students who shot on location in single camera style exported their completed projects to a SanDisk 1 TB drive in 1920x1080 ProRes. When the shoot was done, they could plug in the drive and get instant access to every shot from the USB-C drive, quickly shuttling through the day's project.
Students shooting live programming with our three Hitachi studio cameras recorded directly to the HyperDeck Shuttle HD on SD cards using our ATEM Mini Pro’s HDMI output. During the course, at least, the HyperDeck Shuttle HD became our DVR rather than our older, much more expensive DVR with removable drives.
[Beyond The Tech: Out of Balance]
We did run into a problem, however, because we failed to read the fine print. Only a few of the projects on the SanDisk drive were accessible. That's when I noticed in the manual that our drive was not listed as one of the HyperDeck Shuttle HD’s compatible drives. We also had issues with an SD card that was not listed.
Blackmagic Design maintains an updated list of recommended SD cards and USB-C drives on its support center webpage. We were able to access some files on our non-compatible SSD drive, but that's not a reliable way to work. Better to use a compatible drive and have no issues.
In addition to making sure your drive is on the compatible list (check that first), the recorded file is only readable if the menu is selecting the correct codec. If you recorded in ProRes and your HyperDeck Shuttle HD is set to H.264 or DNxHD, the HyperDeck Shuttle HD won’t see your file, which means no playback.
Easy Access
Once we acquired media that was on the list (both an SD card and an SSD drive), students were able to play their projects. The process was much faster than selecting individual clips on the computer and using a mouse to pick out specific shots to analyze.

The students producing live TV with the ATEM Mini Pro had the output recorded to the HyperDeck Shuttle HD (and compatible SD card). Setting the HyperDeck Shuttle HD’s Record menu to H.264 kept the files smaller but still easily accessible. Again, it’s important to note that the unit will only read the files of the selected codec. Luckily, with a class like ours, we set the parameters of the recorded projects.
[Review: 5 Things to Know about the Jabra PanaCast 20]
The HyperDeck Shuttle HD couldn’t be easier to use. There is simply no learning curve. Our students loved the new technology and adapted to it almost instantly. This product must be the easiest item Blackmagic Design offers (and quite possibly the smallest). Limited only by the drive’s storage capacity, there is no faster way to access digital files.
As a teaching tool, the large shuttle dial on the HyperDeck Shuttle HD got to the shot faster than any computer mouse. The HyperDeck Shuttle HD is a great little “still store” for your files. You can access any files you want and cue them on demand—and it's much less expensive than recording to a separate DVR. As long as your files are recorded in the selected codec, you are good to go.

