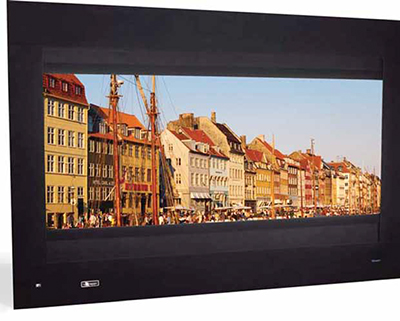
Stewart Filmscreen’s Director’s Choice While most AV pros are rightfully proud of their projectors and how they can light up a room with sharp, vivid images and smooth video, there’s an element that they often give less weight to: the screen on which the image is created. In fact, whenever you project an image, the screen is just as important as the projector you’re using.
“The size, type and placement of the screen are critical to getting a sharp image that everyone can see,” said Dave McFarland, marketing director at Stewart Filmscreen. “The right screen can make a bad projector look better while the wrong one can make a good projector look bad.”
In other words, having the right screen strategy is paramount to creating the right effect with the screen fitting like a hand in a glove with its projector. “The projector and screen need to work together, not fight each other,” adds McFarland.
SIZE MATTERS
After the projector creates its image and sends it across the room to a screen, it reflects off the screen’s surface and travels to the viewer’s eyes. As a result, the physicality of the screen — its size, shape and location — is critical.
Given the constraints of the room’s geometry, you usually want to get the biggest screen, but don’t go too far. While a screen that extends to the floor of a stage is perfectly appropriate for projecting movies, it’s too much if someone is going to stand in front to deliver a lecture, perform a religious ceremony or give a product introduction. They will not only be blinded by the projector’s beam but will cast annoying shadows on the projected material. For this application the bottom of the screen should be about six feet off the ground.
Context is key. “You have to imagine how the projector and screen will be used day-in and day-out,” observed Wendy Cox, director of training and customer support at Da-Lite screens. “It has to perform its intended role and be part of the room.”
While going through floor plans and drawing sight lines is a must for new construction, nothing beats being there. Regardless of whether it’s a boardroom, classroom or auditorium, sit down close and far away from the screen to see what the view is like. If you get a good and complete view of where the screen will be, it is right for the purpose.
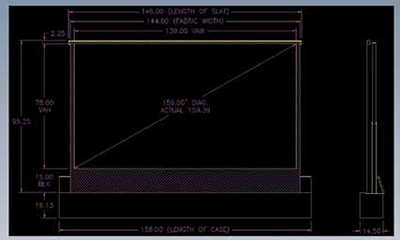
Da-Lite’s Ascender Electrol Shape counts for a lot, as well, when it comes to what will be shown and how far people should be to the screen, or as Da-Lite’s Cox said: “There’s no one size fits all for screens.”
- If it will be primarily for projecting the output of computers, a traditional 4:3 aspect ratio screen fits the bill. A good rule of thumb is that viewers should sit no closer than 1.8-times the screen’s diagonal dimension.
- On the other hand, if it will be used for showing HD material, a 16:9 or 16:10 screen is a better choice. Here, seats should not be closer than 1.4-times the diagonal measurement of the screen.
- Finally, a full Cinemascope screen is for dedicated movie theaters and has a 2.4:1 aspect ratio. The closest viewer should be at least 2.4-times the screen’s diagonal distance away from it.
Don’t worry, this decision doesn’t lock you into a particular format, but you sacrifice size. For instance, a 4:3 screen can be used with wide-screen sources and vice versa, but the projected image will have a ribbon of blank space above and below (for a 16:9, 16:10 or 2.4:1 image projected on a 4:3 screen) or on the sides (for a 4:3 image on a 16:9, 16:10 or 2.4:1 screen).
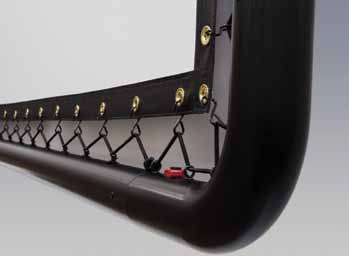
Draper’s Lace & Grommet
While most screens are rectangular, you can get ones that are round or oval for things like church services, marketing announcements and theatrical performances. Draper’s Lace & Grommet family of screens can be custom built to your dimensions and shape. Held on a powder-coated black tube frame with bungee cord material, the screen’s material is always properly tensioned so that the screen remains taught with no wrinkles.
NO GAIN, NO PAIN
Below the surface, most screens are made of a vinyl backing with a white, silver or gray projection surface. Because the image is reflected off of the screen’s surface to the viewer, its optical qualities can be the difference between success and failure. This is where the idea of gain, or the relative reflectivity of the screen’s material, comes in.
Gain is the ratio between the screen’s ability to bounce light back to its source divided by one made of magnesium carbonate, a matte white material; magnesium carbonate has a gain of 1.0. Screens with gains of 1.2 and 0.9 would reflect 20 percent more and 10 percent less light than magnesium carbonate does.
Because higher reflectivity screens send more of the projector’s light to the observer, a higher gain screen means you can use a lower output projector. This works for locations like classrooms and public spaces where you can’t control the ambient light. For other places, like a dark theater, a low-gain screen makes more sense.
It’s easy to overdo gain. “You can easily go too far when it comes to high-gain screens,” observed Stewart Filmscreen’s McFarland. That’s because with high-gain screens you get hot spots, color shifts and sometimes the screen can show reflections of the room or even the projector itself. “It’s best to use as low-gain a screen as you can get away with,” he added.
When picking a screen material, it’s best to get samples and try them out by taping them to the wall where the screen will go next to each other. Added McFarland, “that way, you’ll see the differences in image quality and reflectivity, side by side.” Most screen-makers will supply swatches to try their products out.
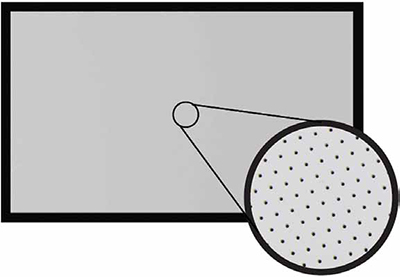
Stewart Filmscreen’s PerfOrado Instead of fighting a high-gain screen’s reflectivity, there’s a projection trick that can help make the most of this type of screen. Rather than aiming the projector at a steep vertical angle, shoot for a beam that’s as close to level as possible. This keeps the image from scattering off at an angle and aims the screen’s image as close to the viewers’ eyes as possible.
The screen doesn’t have to be a passive imaging device because the latest from Da-Lite is a screen that has an HD USB-based video camera built into the bottom bar. Called ViewShare, it works with the Skype, Lync, and other video services and offers schools and businesses a two-for for making video calls. It’s available in a variety of screen sizes with 16:9 or 16:10 aspect ratios and the camera provides a 90-degree field of view, a 4X zoom as well as automatic low-light correction.
DISAPPEARING ACT
Once you have your perfect screen in place, it doesn’t have to stay there. Some of the best screen installations are moveable, allowing a space to fulfill two missions, like screens that can double as a whiteboard in a classroom. “Dual-purpose projection screens are really catching on in popularity,” said David Rodgers, marketing manager at Elite screens. “These are professional- grade projection materials that have been specially treated to function as dry-erase whiteboards.”
Others can do a disappearing act by electrically rolling themselves up inside a tube in a wall or ceiling. Da-Lite’s Ascender Electrol flips this idea over. It is mounted in the floor below a trap door and when closed you can walk on it. Flip the switch and it rises out of the floor while its scissor frame snaps into position, holding the screen taut without any wrinkles.
In fact, most professional and academic theaters have large enough fly-spaces above the stage to accommodate a big screen that fits within the proscenium arch for movies and events. When a show is being produced, the screen can be flown out of view and stored in the fly space above the stage.
The latest development in screen and projector technology is the increasing use of ultra-high resolution 4K systems that offer double the resolution of standard HD projectors. So far, this is mostly a professional theater venue item and used for filling huge room-sized screen without the images getting pixelated or soft. But, as the projectors get less expensive, they are turning up in lecture halls, classrooms and churches.
The good news is that the screen material was designed for use with 70-mm analog film, which has a much higher resolution than 4K’s 4.096 by 2,160 format requires. “The screens are here and ready,” claimed Stewart Filmscreen’s McFarland.
When creating an immersive experience, sound counts for a lot. For instance, many set ups have a wall of speakers behind the screen so that the audio and the images appear to come from the same place.
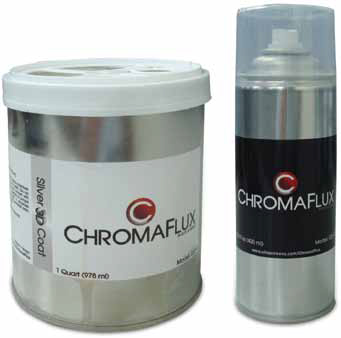
Elite Screens Chroma Flux Screen Paint and Projection Screen Diffusor To make sure the sound comes through loud and clear, the screen material has tiny holes in it. For instance, Stewart Filmscreen’s PerfOrado screens have precision holes punched in them. The holes are so small that they don’t affect the image, but allow the sound to pass to the listener unobstructed.
While projectors come and go as technology improves, the screen generally stays put. Rather than the typical three- or four-year replacement cycle for projectors, a screen is generally a part of the building infrastructure and isn’t changed for upwards of 30-years. Make sure you get the right one because it will likely be there long after you’ve left.
Brian Nadel, a contributing editor to AV Technology Magazine, is the erstwhile editor of Mobile Computing & Communications.
DIY: Paint Your Screen
Who needs an expensive dedicated screen when you can create your own? In fact, many walls can be made projector-ready with special reflective screen paint so that it’s exactly the size and shape you want.
“A paint-on screen does have its perks,” said David Rodgers, marketing manager at Elite Screens. “It allows designers to explore the space in turning almost any surface into an actual projection surface.”
The first step is to pick the wall carefully because those made of brick, cement block or stone aren’t smooth enough. Plaster and wood work the best, but you’ll still need to sand away any bumps or fill in any depressions, because even slight surface imperfections are magnified when projected on.
If the projector is set up, turn it on and mark off where the image will be with a pencil. You can either tape it off and paint a black border or paint the entire wall as a projection screen, which is ultimate in projection flexibility.
Although you can use standard interior white paint, the uniformity and control over gain will suffer. By contrast, Elite Screen’s ChromaFlux paint turns a flat surface into a projection screen similar to the fabric ones they sell. The paint can be either brushed or sprayed onto the surface and comes in a variety of gain levels for different applications. Check out http://elitescreens.com for more info.
A word of advice: get extra paint because you’ll need to put on two coats. For instance, a gallon of ChromaFlux is enough to cover 120 square feet, or a 12.5-foot diagonal screen area.
While it takes a lot of time and effort to do it right, a paint-on screen has one big advantage, particularly at public venues. It can be wiped clean. Plus, if something does stain the screen, just get out your paint brush and touch it up.
